Wednesday, March 22, 2017

Using Adobe Spark to Explore Essential Questions (GUEST POST)

In my role as a Digital Learning Coach, I have the privilege of working with teachers ("fellows") supporting them in finding ways for technology to improve / enhance the lessons they teach with the goal of better & deeper student learning. Several fellows have taken the leap to blog about their experiences and share specific lessons with all of you. I hope you benefit from reading about their journey.

Post by: Erin Thomas, High School English Teacher

Cross-posted from techfellowship.blogspot.com

One of the struggles I have been faced with as a teacher is figuring out how to encourage students to slow down and think critically about a complex topic or text. The art of “wondering” our way toward an answer over time seems to have dissipated as technology has made it increasingly easy for students to arrive at immediate resolutions. One way we have been combating this issue, and working toward fostering ongoing, academic inquiry is through the use of essential questions.


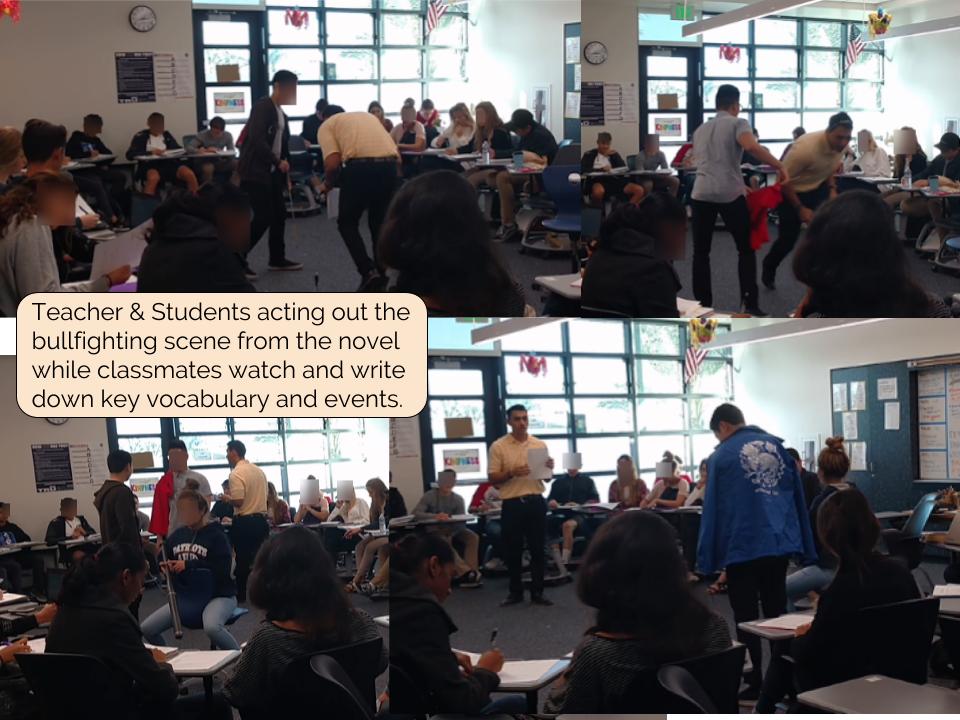
Last week, I introduced a project to my classes which uses Adobe Spark to engage students in an investigation of the essential questions associated with their current thematic unit. When I designed this project, one of my main focuses was to encourage my students, through the details of the project, to “wonder” about a topic over an extended period of time. I first introduced the essential questions to my students at the beginning of the unit when we started our first core work, Lord of the Flies. While reading and analyzing Golding’s novel, students explored the questions in relation to the core work, various poems, visual texts and nonfiction texts. Once we had finished the novel, I introduced the Adobe Spark project.


As I explained the project to my students, I made sure to emphasize that this would be a project that we would be adding to at different benchmark points throughout the unit. Again, one of the goals being to have students explore an essential question through multiple core works and ancillary texts. Since we have three core works for this unit, I decided to have students create the first segment now, before we begin All Quiet on the Western Front, again before we begin Antigone, and then at the end once we have reached the conclusion. By having my students revisit, and add to, their Adobe Spark videos over the course of the unit, my hope is that they will get to closely examine how their own understating of a topic evolves through a deep examination of multiple texts. For me, it is very important that I create opportunities for my students to participate in a rigorous academic environment, which teaches important skills by exposing them to rich and complex texts.


How the Project Asks Students to Think:
When I design any lesson, I always ask myself, "What kind of thinking do I want my students to do?" Below you will see the general outline of the type of thinking this project requires of students. By having them revisit the project three and this type of thinking three times, over the course of the unit, they will get to trace the development of their ideas, and hopefully see the benefit of "wondering."
Marrying Technology with Content:
In regards to the actual technology, most of my students had not used Adobe Spark before, but I did create one earlier in the month to give them a refresher on how to write a theme statement, so they had seen it used before, just in a different context.


For those who are unfamiliar with the technology, Adobe Spark is essentially a forum that allows users to create video slideshows. The site offers various layouts, themes, music and voice recording capabilities, all are fairly simplistic and extremely user friendly.


Since I did this project with both my honors and CP classes, I outlined my modifications below. As I have been working as a tech fellow this year, I have been learning that I have to consider not only how I scaffold content, but also how I scaffold tech.


Honors
College Prep
  • Introduced project
  • Five minutes to explore the technology
  • Students created slides
  • Next day follow-up, completed voice recordings
  • Introduced tech the day before I introduced the project; allowed time for students to explore the technology
  • Introduced project; showed Teacher Model EQ
  • Provided students with a SLIDE ORGANIZER which I required them to complete before creating anything in Adobe Spark
  • Next day, students created slides and completed voice recordings using the organizer as a “script”
A note on CP modifications:

My rationale for making these choices is really based on what my honors students are ready to do at this point in the year. My desire for second semester to be a release of responsibility back to all of my students; however, my CP classes still require some additional scaffolding.

In addition, I made the choice to introduce the tech to my CP students at the end of the period, the day before I assigned the project, because that class in particular can get a little excited when we try something new. For my own personal sanity, this modification was key. They were incredibly focused the day they actually started the project because they had already had time to squirrel around with the tech the day before.  


Per the advice of my tech coach. I had my students submit their projects on a class slides which I posted to Google Classroom. They simply added their group names and the shareable link to their Adobe Spark videos


Overall, I was pleased with how these projects turned out in all of my classes. The feedback I have gathered so far from my students has been general, but here are their overall impressions:


  • They prefer Adobe Spark to screencasts
  • They had fun coming up with their own connections for the project
  • They preferred to create the slides in Google Slides first, and then transfer those slides into Adobe Spark, because this made it easier for them to collaborate


Sample Student Projects:


CP Student Sample
* As a side note, the essential questions I gave my CP students were slightly different HERE are their specific project guidelines

HERE is a link to the rubric I created to provide feedback to the groups. 


A few tidbits about using Adobe Spark:

  • As noted by my students above, it does not have a collaborative feature, so if you want student groups to create one video, it would be worth considering having the begin in Google Slides. They would then have to upload each slide as a JPEG into Adobe Spark, but my students assured me that this wasn’t too labor intensive.
  • Encourage students to keep the responses to 20 seconds or less. If they feel like they have more to say about a particular slide, they can simply “duplicate” it and continue their recording.
  • I had to constantly remind ALL, despite my models, to not write everything they were planning on saying on each of their slides. Once they thought of themselves as the narrator of their video, they were fine.

If you are looking for a way to increase the "wondering" in your classroom through essential questions and technology, this is a great way to go about it. Happy Adobe Sparking-ing!


Purchase my book today!  Click here for more details and to place an order!  Also on Amazon.com at bit.ly/fwkirch

Monday, March 20, 2017

#CUE17 Takeaways - as told by my tweets

I had a great time sharing and learning at #CUE17 this last Thurs-Sat.  While I was busy presenting (4 sessions and 1 workshop this year!) a lot of the time, I was still able to attend the keynotes and 2 concurrent sessions.

The keynotes by Jo Boaler and George Couros left me feeling, "All my teachers need to hear this!!"

 I also appreciated the questions that attendees posed in my questions that furthered my thinking and continued to expose me to other perspectives.  You can see all my session resources at 2017.cue.org

Here are my tweets that show my biggest takeaways from the conference: 


 Comment: "I'm not really into tech"
Answer: "It's not about U,it's about the kids!"
Stop using excuses 4not innovating in your clsrm! #cue17
— Crystal Kirch (@crystalkirch) March 17, 2017


Purchase my book today!  Click here for more details and to place an order!  Also on Amazon.com at bit.ly/fwkirch

Saturday, March 18, 2017

Screencasting our Train of Thought (GUEST POST)

In my role as a Digital Learning Coach, I have the privilege of working with teachers ("fellows") supporting them in finding ways for technology to improve / enhance the lessons they teach with the goal of better & deeper student learning. Several fellows have taken the leap to blog about their experiences and share specific lessons with all of you. I hope you benefit from reading about their journey.

This is cross-posted from techfellowship.blogspot.com

Guest post by Ms. Tala Pirouzian, High School ELA Student Teacher

My name is Tala Pirouzian and I am a student teacher in the English department at Beckman! As a former student of the school, I love reflecting on the educational changes that have occurred over the past few years. One change that I find to be powerful, valuable, challenging, and engaging is the role of technology in the classroom. As my mentor teacher, Erin Thomas, and her tech coach, Crystal Kirch, discuss when and how to bring the tech into the classroom, I am continuously reminded that the purpose of using technology is supposed to be to support students’ learning by making instruction more engaging and effective. Thus, I have found it to be a form of litmus test in that before a teacher uses a tech tool they determine: what purpose does it have? is it the right tech? how are students going to experience and learn from it? how is instruction going to be enhanced?
One lesson that I am eager to share with others involved using a new (new for me and my students this year) tech tool, “Screencastify,” in order to analyze author’s craft. As students develop and practice their close textual analysis, we added a new layer to their annotation and analysis by asking them to use the “Screencastify” extension. This tool was supposed enhance student learning in that as they “draft talk” their way through their analysis, they will be better equipped to write about it.
First, I posted a model screencast (about 5 minutes) in which I commented on why I annotated specific parts of the passage and then authentically verbalized my analysis of the passage.
Here is a screenshot of my sample. Feel free to listen to it here.
During the lesson, my students students selected one of nine passages from the text to annotate using Google Drawing or Kami, and then they used the “Screencastify” tool to make their “thinking visible.” This is one of the most significant and valuable parts of this lesson in that the tech tool gave all my students the opportunity to voice their thoughts and understanding. Furthermore, they were all using the content language as experts in the discipline would! As I watched and listened to their screencasts, it was like a window into their reading minds. Sometimes we highlight or mark the text without taking the time to rationalize and reflect on it, which also leaves the teacher asking why did you annotate what you did? Or what made you think that? This tool asked students to explain what they were highlighting or marking, and why.
Here are some sample screenshots of students’ annotations, which they provided a screencast of:


The screencasts range from 3-5 minutes. Following this, the students used their annotations and screencasts to write a short close textual analysis.
Here is a sample written work (with peer feedback):

As I reflect on this lesson, I realize that such technology not only serves to improve students’ digital literacy but also enhances their content skills in that they are annotating the passage using Google Drawing and Kami, communicating their interpretations and organizing their analysis via the “Screencastify” extensions, and then creating a written product. This offers students a chance to demonstrate their learning in different ways.
I definitely recommend this tech tool to others because it truly does make thinking visible in an innovative and effective way. I am so eager to try out different technology in the classroom and read about the ones you all are using!


Purchase my new book today!  Click here for more details and to place an order!  Also on Amazon.com at bit.ly/fwkirch

Friday, March 10, 2017

Turning Online Discussions into Meaningful Class Conversations (GUEST POST)

In my role as a Digital Learning Coach, I have the privilege of working with teachers ("fellows") supporting them in finding ways for technology to improve / enhance the lessons they teach with the goal of better & deeper student learning. Several fellows have taken the leap to blog about their experiences and share specific lessons with all of you. I hope you benefit from reading about their journey.

This is cross-posted from techfellowship.blogspot.com

Guest post by Ms. Erin Thomas

I am not a techy person by nature. The latest gadgets, fancy apps, and social media aren’t really my thing, so when I decided to commit to being a tech fellow this year, I was nervous about how things would go. One of my biggest concerns was that the technology I brought into the classroom would become a distraction from the actual learning I wanted to take place. My tech coach vehemently assured me that we would only bring in technology when it made sense and would serve to enhance the lesson I had planned.

A couple of weeks ago, I put her assurances to the test. I told her I wanted to find a way to take an online discussion and push it out into the classroom. I was curious if I could find an effective way to make a online discussion meaningful to their person-to-person interactions in class. The lesson series took a total of three days: one day for the online Verso discussion, one for the in-class 4 Corners discussion activity, and one for miscellaneous post recap and reflection which I wanted them to do. More information can be found about this style of discussion in Catlin R. Tucker's Creatively Teach The Common Core Literacy Standards with Technology


I decided to keep the online discussion fairly broad. I had them respond to two questions about the reading, with the goal being to simply get them warmed-up for their in-class discussion. They were asked to make both an initial post with their response to the question, and then one response to one of their peer’s responses.


That night for homework, I had them respond to a Google Form survey HERE which required them to write two open-ended questions based on their online discussion. My plan was to pull at least a few of their questions and use them in the Four Corners discussion in class the following day. This extra step really increased their buy in the day of the Four Corners activity. They were excited to see their questions from the form form filtered into the different rounds of discussion.

The in-class discussion took a fair amount of set-up to get everything into place, so they could participate in the in-class discussion I had in mind. My goal was for them to participate in four different, ten minute discussions, each with its on focus and questions. Each round they would move to a new table and would meet with a new grouping of their peers.


With the help of my amazing tech coach, we set-up a Google Sheets which organized them into groups, rounds and discussion roles. Students were given the Google sheets the day before the in-class discussion, so they could come to class prepared to make the numerous transitions as smoothly as possible. One adjustment I made to this portion of the lesson when I did it the following week with my CP students was to have them write down their assigned roles and rounds on a handout I created. This eliminated some of the issues my honors students had with forgetting where to go. CP Handout


The day of the discussion went great! It was so exciting to see them moving around and interacting with so many of their peers in one class period. My honors students tend to be really strong in discussion, but I had the same level of participation from my CP students a week later. As a teacher, I want to create opportunities for my students to think critically about a text and to articulate that thinking through meaningful discussions. The online discussion, partnered with the in-class Four Corners activity, did just that.

I did do a twenty minute recap of the information covered during the discussion with my students the following day, but it was mainly just a way for me to solidify what I observed them talking about in class. Additionally, I had them complete a final Google Form reflecting on the process HERE , their participation, and the relevance of the online discussion. The feedback they provided was enormously helpful when I went to set the same lesson series up for my CP students. In addition to the adjustment I mentioned earlier, I also chose to eliminate the role of “time keeper”, it felt fairly irrelevant to me during the discussion, and their responses confirmed that thinking.


The vast majority of my students indicated on their Google Form that they preferred this lesson series to the typical Socratic Seminars we have on a fairly regular basis in my class. Many of them shared that they felt more confident participating in this type of discussion, and that having the online discussion in advance of the in-class activity helped them to feel more prepared.

On a purely pedagogical level, I was really pleased with how this lesson turned out. While it was a bit labor intensive to complete all of the set-up required to make the Four Corners discussion run smoothly, it was completely worth it. I was so happy to see my students show how independent they can be of me while having a sophisticated, academic dialogue with their peers. And I was even more excited the following week to watch my CP students find the same success.


I still wouldn't say I am the most "techy" person, but I have learned to really enjoy it. I have seen how it can make a lesson I have planned more dynamic and engaging, while also allowing me to be creative and innovative as a teacher.


Purchase my new book today!  Click here for more details and to place an order!  Also on Amazon.com at bit.ly/fwkirch

Wednesday, March 8, 2017

Scaffolding Reading Comprehension in a Foreign Language Class


In my role as a Digital Learning Coach, I have the privilege of working with teachers ("fellows") supporting them in finding ways for technology to improve / enhance the lessons they teach with the goal of better & deeper student learning. Several fellows have taken the leap to blog about their experiences and share specific lessons with all of you. I hope you benefit from reading about their journey.


~~This is cross-posted from techfellowship.blogspot.com~~


I wanted to share a lesson from one of my fellow's classes.  Helping students in Spanish 3 to get comfortable with reading their first novel that is fully in a foreign language requires a lot of support and scaffolding.  Not only do they need to understand grammar and vocabulary used throughout the novel, but they also must be able to piece everything together enough to comprehend the storyline. 

To facilitate this learning, we decided to utilize several instructional strategies (both with and without tech) that would allow students to process their reading.  As students worked through the novel, we tried to utilize different strategies (matching with each of the four goals below) to keep students on their toes and to keep things fresh.


The goals for the novel & strategies to help meet each goal.


STEP 1: Prepping for Comprehension + Working with Vocab / Verb Tenses

Before reading the first couple pages, students read a summary passage that one of last year's students had written. Using GoFormative, they edited the passage for grammar, verb tense, and agreement. In addition to exposing them to new vocabulary and helping them build their skills around using the correct verb tense, reading the summaries helped to prepare their minds for what they would see next.


STEP 2: Reading & Annotating chapter (supported with TPR)


While students could have used Google Docs or Kami (PDF annotation) to read and annotate the novel, we wanted them to do this on a hard copy so they wouldn't have to be navigating between multiple screens for the upcoming activities.  In addition, because this is their first exposure to reading a novel completely in a new language, we wanted to keep the "comfort" of being able to read and annotate with pencil & highlighter.  After reading and annotating the first 4 pages of the novel individually, the students reviewed the events they had just read about through a TPR "Total Physical Response" activity, where Mr. Miranda guided the class in "acting out" what had happened.


STEP 3: Sequencing Key events together


Students then got in collaborative groups to put together a sequence map of the events in the novel. Utilizing Google Drawing's Explore feature, they were able to bring in images that helped to communicate what was happening in the story.  The goal of building the Google Drawing was to ensure students had a level of comprehension of the key events in the novel.


STEP 4: Writing about the key events in the chapter & Analyzing vocab / verb tenses

Lastly, they used Verso App to write their own summary, taking what they learned from the sequence map and putting it together in complete, comprehensible sentences, focusing on the vocabulary and appropriate verb tense. Once all students submitted their summary, they were assigned another student (Verso App keeps student names anonymous) to critique, evaluate, and make recommendations for how to improve their writing.  Because all posts in Verso are numbered, it was easy to give each student a number corresponding to a different post to evaluate.

One of the challenges is getting students to summarize in their own words and not just take key phrases from the novel.  To overcome this, we had to make the Verso response a "closed text" response (can't have the novel out).  Students could still access their Google Drawing sequence map to help with their writing.


alternate STEP 4: Speaking about the key events in the chapter


Using either Let's Recap or Adobe Spark, students summarize the key events in the chapter orally rather than in writing.  With Let's Recap, Mr. Miranda just saw their face via webcam, which allowed him to watch their pronunciation.  With Adobe Spark, students brought in images to aid in telling the story of the chapter.  You can see a sample Adobe Spark here.  The students recorded them in class, so there is background noise.  However, that does not take away from the goal of the activity.

Overall Reflection:

Students found most of the activities helpful (either "a little" or "a lot").  They were most uncomfortable with activities that forced them to speak (using Adobe Spark or Let's Recap), but that is a goal they are working towards and should get more comfortable over time. 


Purchase my new book today!  Click here for more details and to place an order!  Also on Amazon.com at bit.ly/fwkirch

Related Posts Plugin for WordPress, Blogger...